![[Part I] Ruby Freedom Stack Web App - Sinatra - MongoDB - Heroku - Minitest](https://digitalpress.fra1.cdn.digitaloceanspaces.com/xhtzjbw/2021/04/freedom-stack-header-1.PNG)
Are you an (aspiring?) Ruby developer looking for some freedom for your web app or API ideas? Or maybe you are just tired of learning all the conventions, rules, or laws that Rails is putting on you and you'd like to move on your own for a bit?
If so, then check this out: In this thorough step-by-step tutorial we will navigate you towards a lightweight application with Sinatra, MongoDB, OAuth, and Bulma running on Heroku. You have most of the control. Fewer frameworks, less overhead.
freedom /ˈfriː.dəm/ noun (for ruby devs) - 1. The power or right to get ideas rolling with gems, architectures, or structures as one wants, at no monetary cost - 2. The state of not being constrained by the burden of learning a big framework or overthinking on a rigid database schema.
We will transform to freedom in 2 phases, building 2 reusable templates on the way:
- An API template with a minimal freedom quotes REST API for your non-UI backends (in case you just want the template, head here: github.com/RichStone/freedom-API-template)
- A web application with OAuth authentication, route authorization, and a beautiful JavaScript-free Bulma UI (github.com/RichStone/freedom-webapp-template)
This post here is about PHASE 1.
PHASE 2 will implement OAuth, route authorization, and a Bulma CSS UI in a different post.
Prerequisites
Ideas 💡
Stuff you want to build.
Time ⏳
Everything's possible within a very reasonable amount of time with the magic of Ruby, Heroku hosting, cloud-based MongoDB, and some shiny gems. Still, you will need to set aside some time to create and learn.
If you just want the templates, grab them from the links above.
My wild guess is that building everything along with this tutorial will take a few hours on average. Plan accordingly. If you track your focused working time on it and let me know after, I will never forget you.
Experience 🎓
You will need to have the programming basics down. You have Ruby installed and you know your way, at least a bit, around the command line, git, and web apps. Or you have a burning desire to get there (If you ever get stuck, ping me).
Money 🤑
No hidden costs, everything's running on open-source and the generous hosting free tiers.
1. Setup Ruby's Sinatra micro web framework
I've been enjoying development with Ruby and Rails for almost a year at this point. I still feel that it's big, intertwined, not easy to oversee. I don't feel the speed and freedom of starting a web or API project yet, that I had with Flask or Node as a backend framework. Let's try fixing that!
$ mkdir freedom-stack
$ cd freedom-stack
$ touch app.rbNow that we have our app project folder set up, let's create a tiny minimal sinatra app in the app.rb file:
# app.rb

require 'sinatra'

get '/freedom' do
  '“Freedom is not worth having if it does not include the freedom to make' \
  'mistakes.” - Mahatma Gandhi'
end
If you have Sinatra installed already (e.g. via bundler: gem install sinatra), it's time to fire up your first app:
$ ruby app.rb
== Sinatra (v2.1.0) has taken the stage on 4567 for development with backup from Puma
Puma starting in single mode...
* Version 4.3.6 (ruby 2.7.1-p83), codename: Mysterious Traveller
* Min threads: 0, max threads: 16
* Environment: development
* Listening on tcp://127.0.0.1:4567
* Listening on tcp://[::1]:4567
Use Ctrl-C to stop
As you can see from the log our app runs on localhost port 4567! 🗽
So, let's see what's going on there:
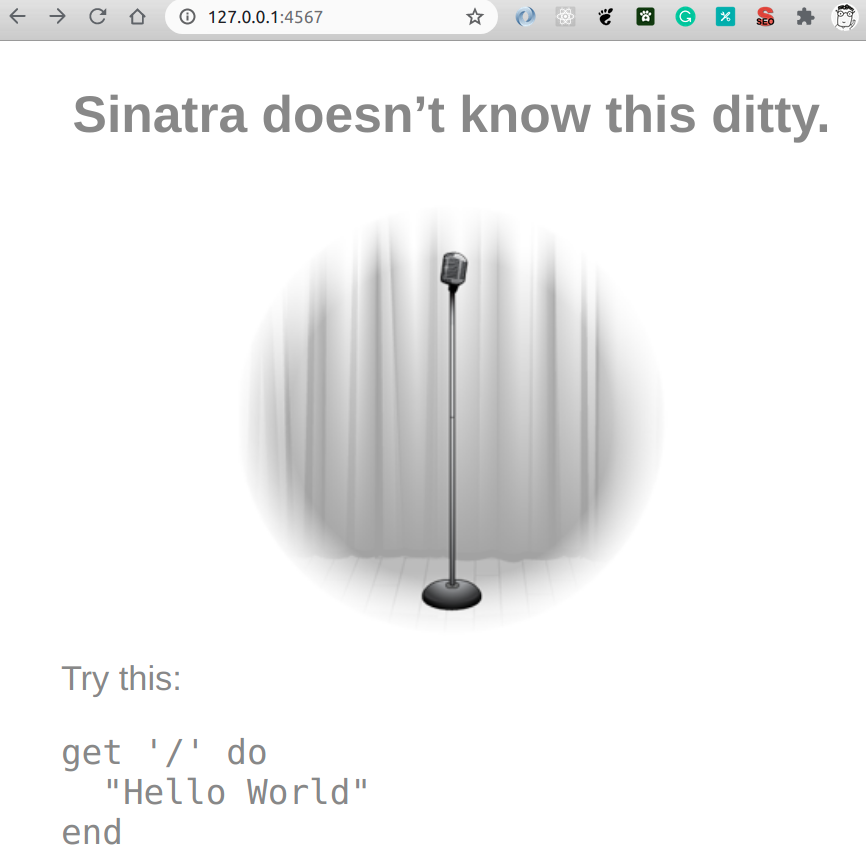
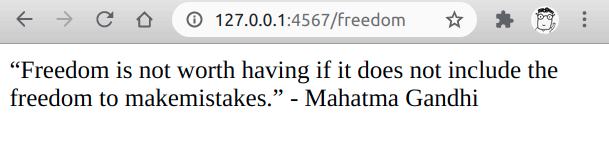
We haven't yet defined anything for the root URL path, so this definitely makes sense! However, our defined route works as expected on 127.0.0.1:4567/freedom:
Good time to share this amazingness with the world on GitHub 🙈
$ git init
$ git add app.rb
$ git commit -m'Set up Sinatra app'
$ git branch -M main # no need for masters!
# create your repo in GitHub and grab your repo URL:
$ git remote add origin git@github.com:USER/REPONAME.git
$ git push -u origin mainGreat, before we go to the next chapter, do you see the terrible mistake that we've pushed to the repo? It's missing a space between "make" and "mistakes". Which irony. It comes from the darkest, most tyrannic part of Ruby: multiline strings.
get '/freedom' do
  '“Freedom is not worth having if it does not include the freedom to make' \
  ' mistakes.” - Mahatma Gandhi'
endNow that it's fixed we should see the changes. In theory. Expectations are high, especially, when you are spoiled by Rails, Flask, and super hot reload JS development setups. With sinatra we need to go an extra step and install the reloader gem first: gem install sinatra-contrib.
Then we can enjoy it in our app:
# app.rb

require 'sinatra'
require 'sinatra/reloader' if development?

get '/freedom' do
  '“Freedom is not worth having if it does not include the freedom to make' \
  ' mistakes.” - Mahatma Gandhi'
end
OK, hope the Ministry of Truth hasn't seen it, quickly amending the changes and overwriting our remote repository with the new truth 🦊
$ git commit --amend --no-edit
$ git push -f-f option, unless you think you know what you do.Now we could use a short break to meditate on what we've just achieved: a truly new backend API freedom application running on localhost without bugs nor mistakes.
2. Deploy on Heroku
So far so good. We were good engineers until now. We've set up an app with git and hot reload right away. However, our app only runs locally. We, on the other hand, love to develop close to production, don't we? Heroku is the GOTO "Platform as a Service"(PaaS) provider for Ruby apps, so let's go with the big names for our big projects.
First, you'll need a Heroku account and the Heroku CLI (creating the account and installing the CLI will take you a few minutes with Heroku's great docs, I'll be waiting here).
⌛
Second, we'll need to set our app up for Heroku. How will Heroku know, which gems to install when we push our application to their servers? The Gemfile tells Heroku exactly that:
# Gemfile

gem 'sinatra'
gem 'sinatra-contrib'And then we add the config.ru which is a configuration file that Heroku uses to start up your app:
# config.ru

require './app.rb'
run Sinatra::Applicationconfig.ru is the configuration file used by the rackup command to run rack apps. It gets called automatically when you push your git changes to Heroku. Just so you heard about it ;))By the way, since we are using the Gemfile now, you can do bundle install and your dependencies will be managed automatically for your app via bundler. Win-win.
Third, we commit our changes and deploy to Heroku:
$ git add .
$ git commit -m'Set up for Heroku deployment'
$ heroku create # this creates a new Heroku app
Creating app... done, ⬢ sheltered-escarpment-38193
https://sheltered-escarpment-38193.herokuapp.com/ | https://git.heroku.com/sheltered-escarpment-38193.git

$ git push heroku mainWe still haven't defined anything for our root route / and Heroku seems to have its own 404 error handling:

But the /freedom route works as before, so all good for now, we can look at 404s sometime later.
3. Setup MongoDB
SQL is great. But it feels rigid at times. Especially for my developer experience, I always loved to pass around JSON documents from the bottom of a DB up to the top of the client's browser. This is just how my brain likes to think about data and this is also where you need to put the least thought into how to handle data between the different phases.
Some people might miss SQL normalization, relational logic, and fixed database schemas for some use cases. But for my apps and for tons of other flexible use cases where you don't know which kind of data will be dawned on you, it's great to have something like Mongo.
Installing and using MongoDB with some language driver (in our case Ruby) is easy, so let's jump right into it. I would be crazy trying to guess your operating system and to compete with MongoDB's awesome step-by-step guides, so please go there, choose your OS from the menu, and get MongoDB on your machine in a couple of minutes.
⌛
After you've spelled the magic commands from the MongoDB documentation to install and start up the new database, 4 particularly interesting things happened:
- a directory was created for the MongoDB data (AKA the database)
- another directory was created where Mongo writes its logs
- an important configuration file was created to configure the database
- you can now connect to your mongo process via the mongo shell:
$ mongo
> help
	db.help()                    help on db methods
	db.mycoll.help()             help on collection methods
    [...]
> db.getMongo()
connection to 127.0.0.1:27017
> show dbs
admin   0.000GB
config  0.000GB
local 0.000GB127.0.0.1:27017 and we have 3 databases already right after installation, very productive.As you can see, we are on a roll here. So, let's keep with the momentum and connect MongoDB to our Sinatra app real quick (by the way, every step here is its own commit in git, in case you'd like to follow along like a pro ;).
Install mongoid gem
# Gemfile

source 'https://rubygems.org'
gem 'sinatra'
gem 'sinatra-contrib'
gem 'mongoid'
Run bundle install.
Add mongoid configuration
Now we need to let sinatra know where our mongo process is running and which database we want to use. For that, we create a new mongoid.yml file in our project:
# mongoid.yml

development:
  clients:
    default:
      database: freedom_stack
      hosts:
        - localhost:27017
      options:
server_selection_timeout: 1Add mongoid to your app
# app.rb

require 'sinatra'
require 'sinatra/reloader' if development?
require 'mongoid' # get the mongoid ruby driver
project_root = File.dirname(__FILE__)
Mongoid.load!(File.join(project_root, 'mongoid.yml')) # get the configs
...
And that's basically it. Local database connected.
Add a model
What will be the central piece of our API? Let's say we want to manage quotes about freedom.
# app.rb

[... all the requires ...]

class FreedomQuote
  include Mongoid::Document

  field :email, type: String
end

...:quote field should be enough for now.Including Mongoid::Document for your FreedomQuote model is basically like inheriting from ActiveRecord::Base model in Rails. In general, the mongoid gem makes a great effort to get yourself a Rails-like experience, so many things will be familiar for you if you come from Rails.
Add a basic REST API
Now we'll come to the meat of our API, the resources management via CRUD (Create, Read, Update, Delete).
Most APIs have one or more central resources that can be managed by authenticated users or by the public. REST is an API architecture that makes it easier to do. In our case, the central resources are the freedom quotes, so let's manage them.
# app.rb

[... more code in the beginning ...]

class FreedomQuote
  include Mongoid::Document

  field :quote, type: String
end

# Create a new freedom quote
post '/freedom_quotes' do
  quote = FreedomQuote.create!(params[:quote])
  quote.to_json
end

# Read all freedom quotes
get '/freedom_quotes' do
  FreedomQuote.all.to_json
end

# read an individual freedom quote
get '/freedom_quotes/:id' do
  FreedomQuote.find(params[:id]).to_json
end

# Update an existing freedom quote
patch '/freedom_quotes/:id' do
  quote = FreedomQuote.find(params[:id]).update(params[:quote])
  quote.to_json
end

# Delete a freedom quote
delete '/freedom_quotes/:id' do
  quote = FreedomQuote.find(params[:id]).delete
  quote.to_json
end

[... more freedom code ...]Let's check out our glorious users and Read them all:
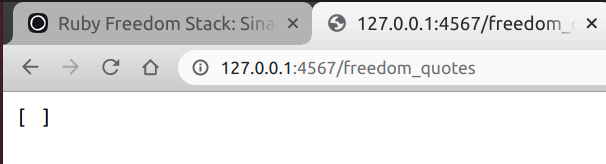
Great, we can see that we have an empty array of freedom quotes. No probs, we will just add someone.
Looking up users is easy in the browser. But since browsers cannot do POST requests, we need another tool for that. For example, cURL that's available on most command lines:
$ curl -X POST --data 'quote=Freedom is near' http://localhost:4567/freedom_quotes
HTTP/1.1 200 OK
Content-Type: text/html;charset=utf-8
X-XSS-Protection: 1; mode=block
X-Content-Type-Options: nosniff
X-Frame-Options: SAMEORIGIN
Content-Length: 58After that we can ask the browser about our freedom quotes again:
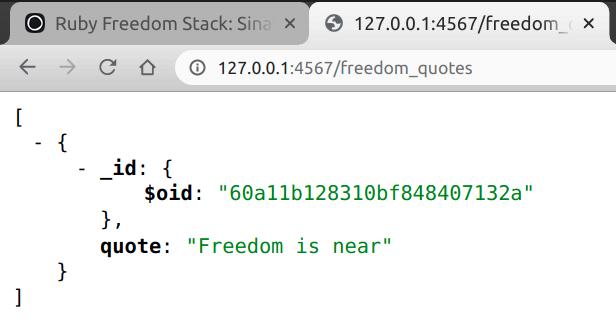
And this is what we see back down in our MongoDB shell:
$ mongo
> show dbs
admin          0.000GB
config         0.000GB
freedom_stack  0.000GB
local          0.000GB
> use freedom_stack
> db.users.find()
{ "_id" : ObjectId("60a11b128310bf848407132a"), "quote" : "Freedom is near" }use and query its freedom_quotes collection to get a user document similar to Rails' ActiverRecord(old mechanisms, new document DB terminology)It's official, we have our first freedom quote in the database! However, that's only running on our computer, AKA "Works on my local". Let's get this quickly in production now.
Bringing Mongo to production
Heroku is lazy and does not host MongoDB databases for anyone. Instead, you can easily plug in MongoDBs Pro version: MongoDB Atlas. It will be hosted on Mongo's servers and communicate with your app on Heroku.
You will have half a Gigabyte of disk space for your account in the MongoDB Atlas free tier. This will be plenty for any simple web app that you implement. If you grow over it, you are probably ready to pay the extra buck for the awesome service that you will get when a database is actually hosted for you (by the way, hosting Postgres on Heroku isn't free forever either; you have 7.000 rows in Heroku's free tier. That's never any near to 512 MB. Never. Ever.).
This will be a process of 5 very short steps, from creating a MongoDB Atlas account to granting access to your mongo database. Do all the 5 steps as described and come back here (I had an issue signing up via Google OAuth when I was on my phone, so if you are reading this on mobile, don't give up! You might just need to wait until you are back at a real computer screen. Which will make all the setup easier anyway).
⌛⌛
Second, get the URL that your Sinatra app on Heroku will use to communicate with the database on Mongo's servers. Here: a brief description of how to make this work.
⌛ get yourself a URL like this:
mongodb+srv://freedom-stack:rich_PASSWORDO@cluster0.zhtt7.mongodb.net/myFirstDatabase?retryWrites=true&w=majorityWe will add this URL to our mongoid.yml to configure sinatra with it:
# mongoid.yml

[... development configs ...]

# new **production** configuration
production:
  clients:
    default:
      uri: mongodb+srv://freedom-stack:rich_PASSWORDO@cluster0.zhtt7.mongodb.net/myFirstDatabase?retryWrites=true&w=majority
      options:
server_selection_timeout: 5One major issue here, we don't really want to store our password in free text. So let's store it in a file that does not get committed to git, but can be read from our local project directory. There's a gem that makes working with a "hidden" .env file easy:
# Gemfile

[...]
gem 'dotenv'
After a bundle install we can add to our app code:
# app.rb

require 'sinatra'
require 'sinatra/reloader' if development?
require 'dotenv'
Dotenv.load
[...]
With this in place, we can now use everything that we add to our .env file as an ENV['VARIABLE'], if we follow the following format:
# .env

MONGODB_CLUSTER_PASSWORD=rich_PASSWORDO
MONGODB_CLUSTER_PASSWORD is a global object provided by sinatra. Everything from the .env file now gets saved there.And not to forget to tell git about our plans, creating a .gitignore file:
# .gitignore

.env
So, if we never commit our .env file to git, how will our deployed app on Heroku know about our MongoDB Atlas password? Great question!
We can set Heroku environment variables directly in the Heroku UI or via the Heroku CLI on the command line in our project repository:
$ heroku config:set MONGODB_CLUSTER_PASSWORD=rich_PASSWORDONow we are going to deploy all the changes to production. Let's commit our latest changes, push everything to our repository, and then push everything to Heroku. And check that everything works as expected on Heroku 😬
$ git add mongoid.yml
$ git commit -m'Add mongoid production settings'
$ git push # goes to our repository
$ git push heroku main

[... tons of output ...]

remote:        Released v6
remote:        https://sheltered-escarpment-38193.herokuapp.com/ deployed to Heroku
remote:
remote: Verifying deploy... done.
To https://git.heroku.com/sheltered-escarpment-38193.git
   ca9870c..d5320aa  main -> main
After a successful deployment, Heroku spits out the URL location where your app is hosted remotely. In the example case above it's https://sheltered-escapement-298346.herokuapp.com/. Take your own URL, Read all freedom quotes (just to see an empty array), then Create a new freedom quote (with cURL or Postman), Delete them, or Update their :quote attribute.
Here are some example cURL commands:
$ curl https://sheltered-escarpment-38193.herokuapp.com/freedom_quotes
[ ]

$ curl -X POST -d 'quote=buuaaa' https://sheltered-escarpment-38193.herokuapp.com/freedom_quotes
{"_id":{"$oid":"6084973cabb19d0004104cdc"},"quote":"buuaaa"}

$ curl -X GET https://sheltered-escarpment-38193.herokuapp.com/freedom_quotes/6084973cabb19d0004104cdc
{"_id":{"$oid":"6084973cabb19d0004104cdc"},"quote":"buuaaa"}

$ curl -X PATCH -d 'quote=@@@' https://sheltered-escarpment-38193.herokuapp.com/freedom_quotes/6084973cabb19d0004104cdc
true

$ curl -X DELETE https://sheltered-escarpment-38193.herokuapp.com/freedom_quotes/6084973cabb19d0004104cdc

true

$ curl https://sheltered-escarpment-38193.herokuapp.com/freedom_quotes
[ ]🎮🎲
Cool, you are back! Hope you played and tested to your full enjoyment!
Speaking of testing, before we wrap up this first version of our template, let's have some basic tests in place to prepare yourself for good engineering practices and maintainable code right away.
4. Set up tests
Tests might let you feel like you slow down in the beginning, but they are speeding you up in the long term and make your overall design better. Sold 🤑
Install test environment
As always, adding some gems...
# Gemfile

[... more gems ...]

gem 'rack-test'
gem 'minitest'
... and installing them...
$ bundle installConnect to the test database
We need a different database for our tests. A database that we can fill and wipe as we desire on every test run. So we need to add another configuration to our mongoid.yml:
# mongoid.yml

[... development config ...]

test:
  clients:
    default:
      database: freedom_stack_test
      hosts:
        - localhost:27017
      options:
        server_selection_timeout: 1

[... production config ...]
It's exactly the same config as for development, just with the database name changed to freedom_stack_test.
Unit tests
There is not much complex unit logic to be tested, we will focus on blunt integration tests that make sure our API does everything it is supposed to be doing between our requests and the communication with MongoDB.
Add integration tests
Let's create a file called app_test.rb. We need to include a bunch of stuff first before we can start testing.
Let's define our environment first, otherwise, Sinatra will always assume the 'development' environment.
# app_test.rb

ENV['APP_ENV'] = 'test'
Now, a few more things. Firstly, we require our app.rb to get all the routes and classes that we've defined there.
# app_test.rb

ENV['APP_ENV'] = 'test'

require './app.rb'
Next, we need the gems that will make all the testing functionality possible.
# app_test.rb

ENV['APP_ENV'] = 'test'

require './app.rb'
# Test gems.
require 'minitest/autorun'
require 'minitest/pride'
require 'rack/test'
And then we finish the setup by connecting to our mongo instance. Since we have defined ENV['APP_ENV'] = 'test' for our environment, Mongoid will connect to the test configurations from the mongoid.yml.
# app_test.rb

ENV['APP_ENV'] = 'test'

require './app.rb'
# Test gems.
require 'minitest/autorun'
require 'minitest/pride'
require 'rack/test'
# Database stuff.
require 'mongoid'
project_root = File.dirname(__FILE__)
Mongoid.load!(File.join(project_root, 'mongoid.yml'))
That's it. Now we build our test class AppTest. It inherits from Minitest::Test to have all the assertion methods like assert_equal. We include Rack::Test::Methods to have the typical methods of a rack application ( get, post, last_response etc.). def app needs to be defined so that rack/test knows how to start your app.
# app_test.rb

ENV['APP_ENV'] = 'test'

require './app.rb'
# Test gems.
require 'minitest/autorun'
require 'minitest/pride'
require 'rack/test'
# Database stuff.
require 'mongoid'
project_root = File.dirname(__FILE__)
Mongoid.load!(File.join(project_root, 'mongoid.yml'))

class AppTest < Minitest::Test
  include Rack::Test::Methods

  def app
    Sinatra::Application
  end
end
Puh, this was quite some preparation, but now we can add a simple test, to test our simple /freedom route.
# app_test.rb

[... lots of setup ...]

class AppTest < Minitest::Test
  include Rack::Test::Methods

  def app
    Sinatra::Application
  end

  def test_gandhi_about_freedom
    get '/freedom'
    assert last_response.ok?
    assert_match /freedom(.*)Gandhi/, last_response.body
  end
end
Now let's run this thing:
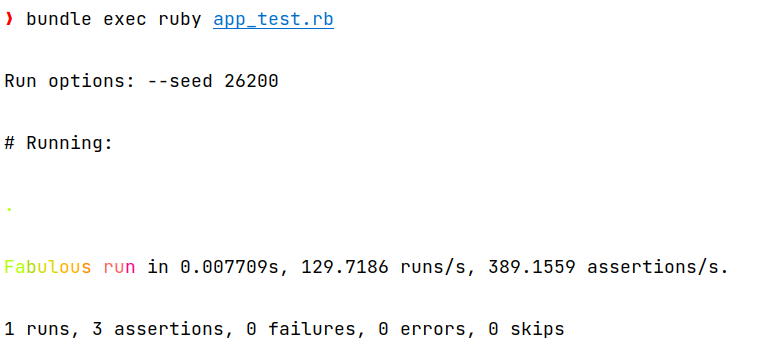
minitest/pride brings some color into the game.bundle exec makes sure that we actually run the tests with all the exact versions installed for this particular project by bundler.
Let's check what happens if we run a test against our empty freedom_stack_test database calling the GET /freedom_quotes route:
# app_test.rb

[... lots of setup ...]

class AppTest < Minitest::Test
  include Rack::Test::Methods

  def app
    Sinatra::Application
  end

  def test_gandhi_about_freedom
    get '/freedom'
    assert last_response.ok?
    assert_match /freedom(.*)Gandhi/, last_response.body
  end

  def test_returns_empty_array_when_no_quotes
    get '/freedom_quotes'
    assert last_response.ok?
    assert_equal '[]', last_response.body
  end
endNow, when we start adding users, we need to make sure that the database is wiped after every test run to ensure consistency in the tests. That's where Mongoid.purge! gets handy. Adding it along with a test that tests our POST /freedom_quotes route:
# app_test.rb

[... lots of setup ...]

class AppTest < Minitest::Test
  include Rack::Test::Methods

  def app
    Sinatra::Application
  end

  def teardown
    Mongoid.purge!
  end

[... some freedom tests ...]

  def test_post_new_freedom_quote
    get 'freedom_quotes'
    assert_equal 0, JSON.parse(last_response.body).count

    quote = 'In Freedom we trust.'
    post '/freedom_quotes', { quote: quote }
    assert last_response.ok?

    get 'freedom_quotes'
    assert_equal 1, JSON.parse(last_response.body).count
    assert_equal quote, JSON.parse(last_response.body).first['quote']
  end

[... much more freedom tests ...]
This is not a tutorial about testing, so I won't go into details, but I promise that I've tested some more which you can check out in the app_test.rb file in the GitHub repo if you are interested.

$ bundle exec ruby app_test.rbAcceptance or end-to-end tests
Missing end-to-end or acceptance tests? As soon as we get our hands on the UI, we will add some cool gems for that and set everything up.
Other than that, we are done setting up the tests! Feels good, doesn't it?
✅ Mini API Backend Template Done
The awesome thing is, you can now use this for any API application that you are about to kickstart. Your API idea might not need a FreedomQuote model, but you can rename it to whatever you like and there you go! 🗽🚀
If you can't wait to bring your API or mini-backend idea to life, here's the link to the repo: github.com/RichStone/freedom-API-template.
How to reuse the Freedom Stack API template?
Check out github.com/RichStone/freedom-API-template, it's the technical source of truth to get you started. But in short, less technical terms:
- Clone the template
- Setup MongoDB locally or remotely
- Run the tests
- Replace
/freedom_quoteswith your own API idea - Change and rerun the tests
- Add other routes and return more cool data
- Write tests ;)
- Push to your repo
- Host on your Heroku
- (optional) Host on your own domain
Nutshell 🥜
We've built a lightweight web app and a bare API backend to get us started. We probably learned a thing or 2 on the way. We have a rough orientation of how to go about developing the templates. What could possibly go wrong?

I could have lost some semicolons somewhere. Let me know if you are the lucky one to find them, I will really appreciate any feedback to improve this guide. I'm also here to help if any roadblocks come up or if you have any thoughts regarding the templates.
Hope this gives you some freedom to start something new or at least to have a bit of fun!
Keep tuned to see the tutorial unfold into the creation of a real web app with OAuth, route authorization, and a Bulma CSS UI in a different post 💚